I’m sure you’ve seen all the tutorials on how to create the coveted “found pottery” look. I kind of used several techniques into my one technique. This is how to get that beautiful found pottery look for less. Here we go!
Supplies
What you’ll need:
- Vessel, vase, pot (whatever you want to makeover)
- Joint compound
- Block sander
- Paint brushes
- Paint
Process
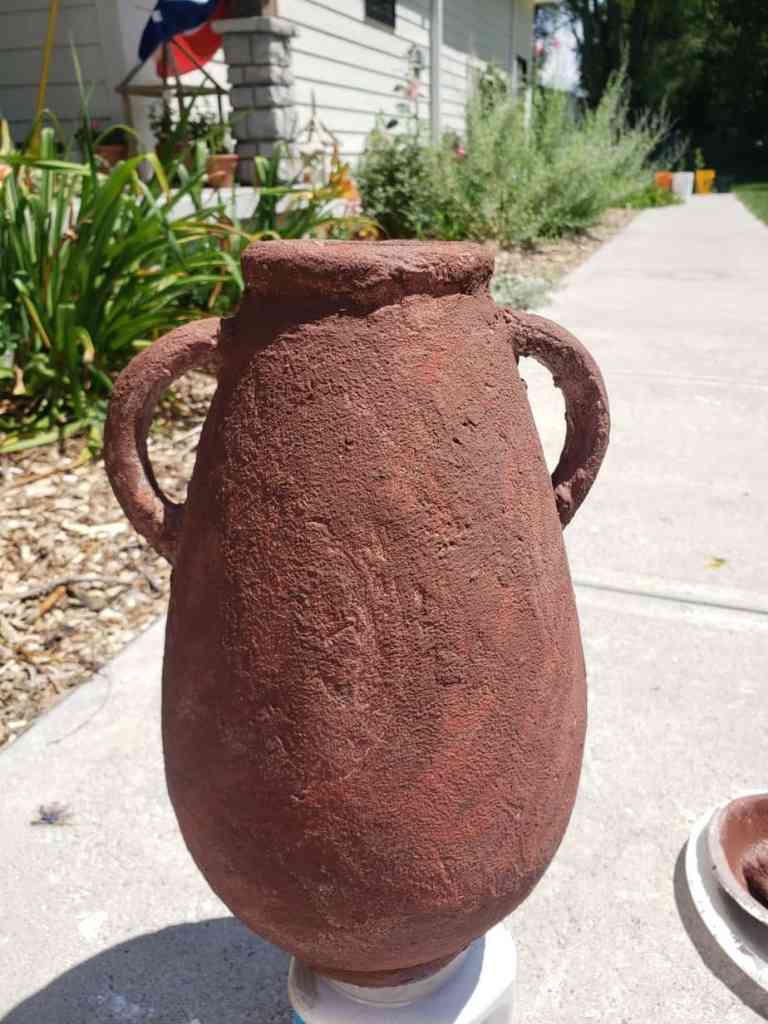
Here’s my vase that I’m going to makeover. I bought it at Goodwill, and I believe I paid around $6-7 for it.


Step one
First, you’re going to apply the joint compound directly to your vessel. I use my hands; you can use gloves or a spackle tool. But I find using my hands works the best and it comes off easily with water. I will do at least 2 coats to ensure the whole vessel is covered with the compound. This gives it a nice pottery/texture feel.

Step two
After the compound has dried, I sand some areas for a smoother look. You can leave it lumpy or sand it all down smooth. Do whatever you want! That’s the beauty of this project, you can do whatever your heart’s desire is! I left some crevices and lumps for texture.

Step three
Now for painting. I used a mixture of wall paint and craft paint. I really wanted a terracotta look, so I used browns and oranges with some creams/tans as well. I did several layers to get that layered paint look. After the darker colors dried, I dry brushed a lighter gray/taupe color over in some spots.


Conclusion
I absolutely love how it turned out. The color is perfect. And the beauty of this project is, if you don’t like the color, you can always change it again! I think it’s a nice pop of color against the white shiplap. I added a simple olive leaf stem with books and beads.
I hope you enjoyed this tutorial and I really hope you try it. It’s super easy (and a little messy). Let me know in the comments if you try it! You can check out my web story here and my IG reel here.
Until next time Treasure Hunters!
